HERE'S WHAT YOU'LL NEED.
- Envelopes
- Hole Punch
- Binder Rings
ONE.
First, you need to figure out how many envelopes you want... you may use as many or few as you like, and remember- you can always add more! You need to arrange your envelopes so that the openings will be the outside edge of your pages. I alternated my envelopes so that I had facing opening pages (i.e. the backs of the envelopes) and facing closed pages (i.e. the fronts of the envelopes). However, you can arrange them how ever you like.
TWO.
Now you are ready to punch holes in your envelopes. I just punched the holes in one envelope, then used that as a stencil for all the other envelopes so that I was sure they would line up.
THREE.
After all your holes are punched, connect all the envelopes using the binder rings.
FOUR.
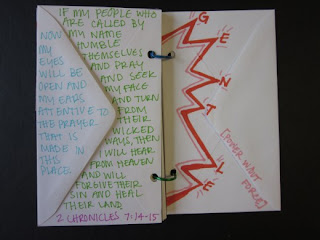
Now comes the fun part! Let your creativity run wild and decorate the envelopes! Use colored pencils, markers, or crayons. Write quotes or verses. Use stickers, scrapbooking pieces, torn out magazines, or photos to add another dimension. The sky is the limit. You can also put things inside your envelopes- whether they be prayers, letters, memories, photos, or lists!
DO IT.
You can make a book for virtually anything- a recipe book, scrapbook, journal, or gift for someone. I decided to make a prayer book, so my envelopes are decorated and filled with verses, prayers, quotes, and song lyrics as well as doodles and drawings. I mainly used sharpies and a little bit of collage.
TAKE A LOOK.


COOL!!!! :)
ReplyDelete