Showing posts with label How-To. Show all posts

Tuesday, November 18, 2014

3 Adorable Gift Wrapping Ideas

So I think by now we all know how much I love the HOLIDAYS! And with Thanksgiving right around the corner I think it's officially time for some good old holiday brainstorming. 

Now, I LOVE Thanksgiving, so I don't want you to get the impression that I'm skipping right over it to get to Christmas... but as I was perusing Pinterest today I just couldn't help but fall in love with these witty and cute gift wrapping ideas! Plus, who ever said gifts should be exclusively for Christmas and birthdays?? I'm a big fan of gifts and especially the kind that come at a time you aren't expecting—so why not give a Thanksgiving gift this year? These gift wrapping ideas are just what you need to make that little gift extra thoughtful and special!

1. Personalize the Plain!
Need to wrap a present in a pinch? Well then this first one is perfect for you! Simply grab some plain paper or a brown paper bag from your last trip to the grocery store and wrap 'er up! Then grab a sharpie and have at it! Add a finishing touch with some string, a bow or ribbon, or even some greenery or other holiday bauble.

//via

2. Special Delivery!
Okay, how CUTE is this?! Tying your packages to the recipients favorite animal (in toy form, of course) is perfect for small gifts. I would probably fall over dead if I received something like this. 


 3. Washi Tape it Up!
Washi tape is everywhere nowadays! Michaels even has a full section with what seems like hundreds of different patterns. So why not grab a few rolls and get to taping? I especially love the idea of using newspaper as the main wrapping... so simple, yet pretty with the added pops of pattern and color that the washi tape brings. This Advent gift looks DIVINE.

//via

So there you have it! Three super simple, super adorable ways to spruce up your packages this Christmas [and Thanksgiving!] season! Happy gift-giving!

P.S. Like literally... I already posted this but I'm coming back because I just stumbled upon this beautiful article on gift toppers! Check it out peeps.

Tuesday, November 11, 2014

5 Ways to Fill Your Walls

Happy Tuesday, folks! Today I want to share with you some of the ways that we have filled the walls in our apartment... and let me tell ya, we have filled the walls.

Blank walls can seem intimidating at first, but armed with some good ideas, a few pretties, and a hammer and nails, you too can have beautiful, meaningful, and even useful(!) wall decor.

So without further ado, here are 5 different ways that we have filled our walls.

1. Large Scale Photography
Yes, I'm going there. BIG. Big seems expensive, right? Wrong! [Well, it can be, but it certainly doesn't have to be.] There's this little big thing called an engineering print that you can get at Staples for a couple bucks. Really. The only stipulation is they are black and white and can turn out a bit grainy or with a little white line running down it. But can you even tell in mine? Nope! They will definitely try and talk you out of it, but stick to your guns on this one, because it is just too good of a deal to pass up! This engagement photo was the first thing we hung up in our new apartment and I love it! It's a great above-the-couch statement piece, and at this price, a great way to fill a big wall! I picked up the frame at a goodwill for 7 bucks.

Total project cost: $10


2. Small Groupings
I think this is one of my favorite ways to display photos... in small groupings that tell a story or show off related items. Here we have four prints from our wedding... two portraits and two detail shots. I love how it shows how we looked on our wedding day. The gold frames are leftover from our wedding and were from the Dollar Tree.

Total project cost: $5


3. Gallery Walls
The ever famous gallery wall! All the frames and objects used in our gallery wall are thrifted or Dollar Tree purchases. You would be surprised what sweet frames you can find for a dollar at thrift stores! I'll be doing a more in-depth post on some gallery wall how-tos and tips I learned along the way, but until then, start collecting frames, photos, and special cards or prints. Or just go ahead and do it! My biggest take-away was that it doesn't have to be perfect, because let's be real, I don't have 10 hours to measure everything out and cut templates. That's what the back of your hammer is for.

Total project cost: $15


4. Miscellaneous Decor
Here's a way that you can get really fun and creative with your walls! Ribbons, lights, chalkboards... the sky is the limit here, people. Have something you love that's semi-flat and hangable? Put it up on a wall! See what it looks like. Take risks!

Ribbon backdrop [from our wedding] total cost: $45


5. Shelves & Storage
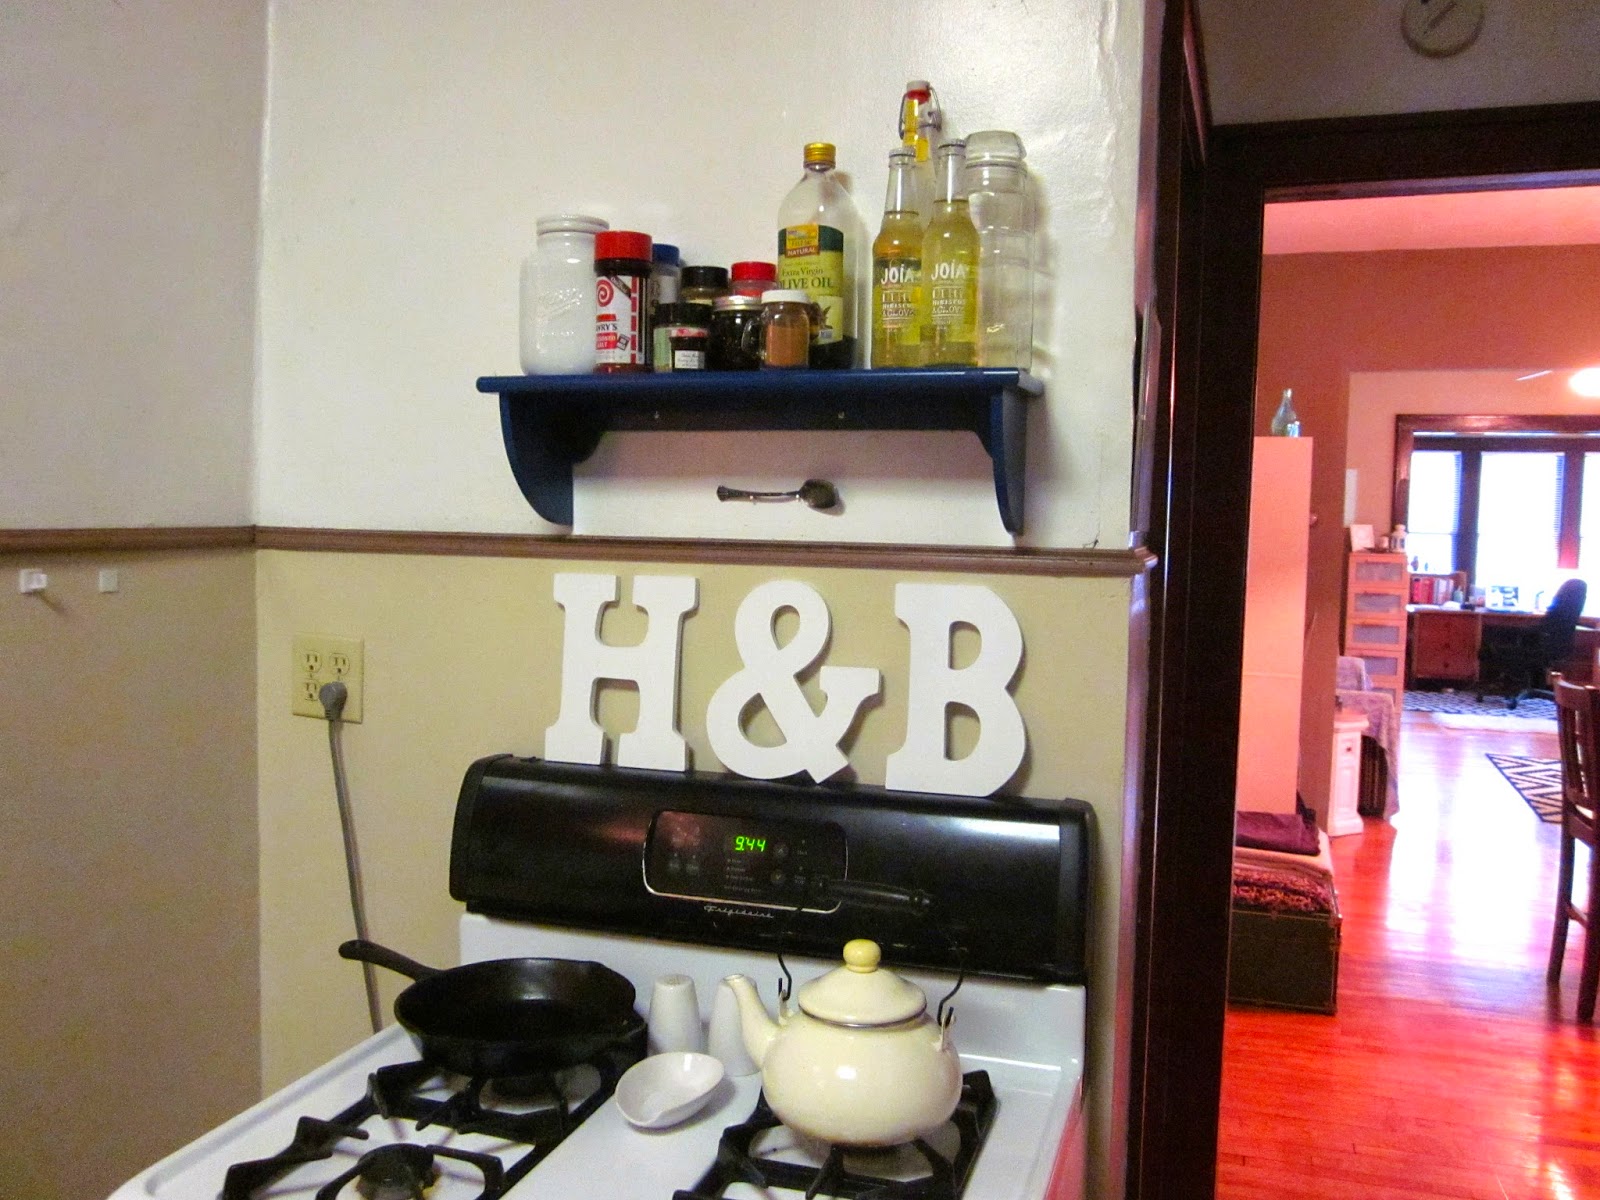
Last, but not least, let's talk about killing two birds with one stone in your wall decor. Have an empty wall that also happens to be near a place where some extra storage would be handy? Great! Add a shelf or other type of storage in lieu of a pretty picture or painting. For weeks I was trying to decide what kind of wall hanging I wanted above our stove. Then I realized we had this extra shelf and it makes for AMAZING storage in a place where we really needed it [and didn't even know it]. Plus, the shelf fills in the space and adds some color and pattern to the once blank wall. Win-win! The mason jar holder is from Target and was a wedding gift, and the mail/key holder was made and gifted to us by Loverboy's sister for our wedding as well.


So, there you have it! Five different ways that you can fill up those empty walls that have been staring you in the face the last weeks, months, or years. Decorating your walls doesn't have to be expensive or intimidating... you just have to get started. So grab your hammer, and get to it!

Thursday, October 30, 2014

That One Time We Made the Flowers for Our Wedding


Ready for your second installment of "How It's Made: Douglas Wedding Edition?" Great! Today we're talking about flowers. This post comes along with it's very own huge shout-out to my friend and 'little sister,' Megan for basically being a floral genius and doing the brunt work of this project. I could not have done it without her... basically I just paid the bill and barked orders. She's also the one who did our engagement photos and also did my hair for the wedding. She's basically a champ. So, here we go.


Step one. Head to Michaels or your local craft store and buy out their whole selection of silk flowers. [Ha... jk, there's like a million flowers there... just try and estimate what you'll need.] Other supplies you'll need: Floral tape, wire cutters, ribbon, packaging tape, any little baubles or extras you want... for example we added feathers to the boutonnieres. We guesstimated that we spent about $60 total on flowers. Not bad for a day's work! And of course, take a photo for posterities sake.


Step two. Spend two movies worth of time selecting, cutting, and assembling 6 bouquets and 11 boutonnieres. We cheated a little bit in that we did use some packaging tape to hold some of the flowers together... but that was eventually covered with an ample supply of floral tape and ribbon, so no one was the wiser! [I'm tellin' ya—cheating works!] We made my bouquet a bit fuller, pinker, and glammy-er [check out those gold baubles!] than the bridesmaids and we tried to mix up the boutonnieres a little by adding little sprigs of color or mini succulents here and there.


Step three. Admire almost finished-product. Here you can see both the boutonniere and bouquet before they were wrapped... the boutonnieres were wrapped with copper wire [see below] and the bouquets were wrapped with thick cream ribbon with a strip of thick lace ribbon in the middle.


I love how Brian's boutineer turned out! If you didn't know I have a crush on succulents so the little babes in there just make my heart so happy. And the feather and copper wire really do a great job of adding that extra little something. 


All the bridesmaids with their lovely bouquets... and, just like bridesmaid dresses, with silk flowers you can totally use them again! [No, really, check it out here.]


I am super glad we did our own flowers for the wedding! It is seriously one of the best choices we made. We made these back in July so they were done months before the wedding, which was such a relief and they turned out exactly how I wanted! Plus, I now have my wedding bouquet on my dresser looking exactly how it did the day I got married. So sweet!

Has anyone else made their own flowers for their wedding day? Link up to some photos... I'd love to see them! 

//all wedding photography via Availeth Photography, all process photos via my awesome, like 2 MP phone camera

Related Posts Plugin for WordPress, Blogger...